
Citrix NetScaler 11.1 Content Switching
- Nov 28, 2016
- 5 min read
Content Switching is a NetScaler feature providing a single IP address to multiple load balance virtual servers. Traffic is directed based on criteria specified by the administrator like FQDN, URL, etc. The following article goes through configuring a Content Switch in front of the Citrix StoreFront and Director servers.

Log on to the NetScaler web management console.

Expand System > Settings and click Configure Basic Features.

Select Content Switching and click OK.

Before we create the content switch we need to create the load balance virtual servers for StoreFront and Director. Expand Traffic Management > Load Balancing > Servers and click Add.

Enter the Name and IP Address for the first StoreFront server and click Create.
Click Add.

Enter the Name and IP Address for the second StoreFront server and click Create.
Click Add.

Enter the Name and IP Address for the first Director server and click Create.
Click Add.
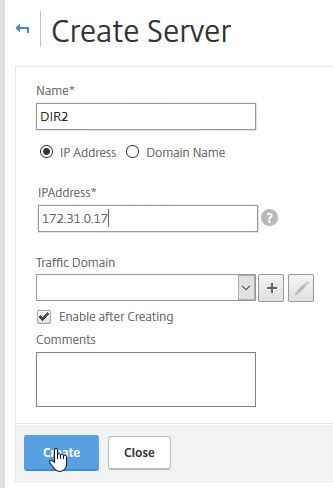
Enter the Name and IP Address for the second Director server and click Create.

Expand Traffic Management > Load Balancing > Monitors and click Add.

We are going to create a monitor for StoreFront; enter Name and select STOREFRONT from the Type drop-down box.

If the StoreFront servers are configured to use https, scroll to the bottom and select Secure and then scroll back up to the top.

Click Special Parameters and enter the Store Name configured on StoreFront. Optionally select the options StoreFront Account Service and Check Backend Services.

Expand Traffic Management > Load Balancing > Services Groups and click Add.

Enter Name, select SSL or HTTP for Protocol depending upon whether https or http will be used to access StoreFront and click OK.

Click No Service Group Member.

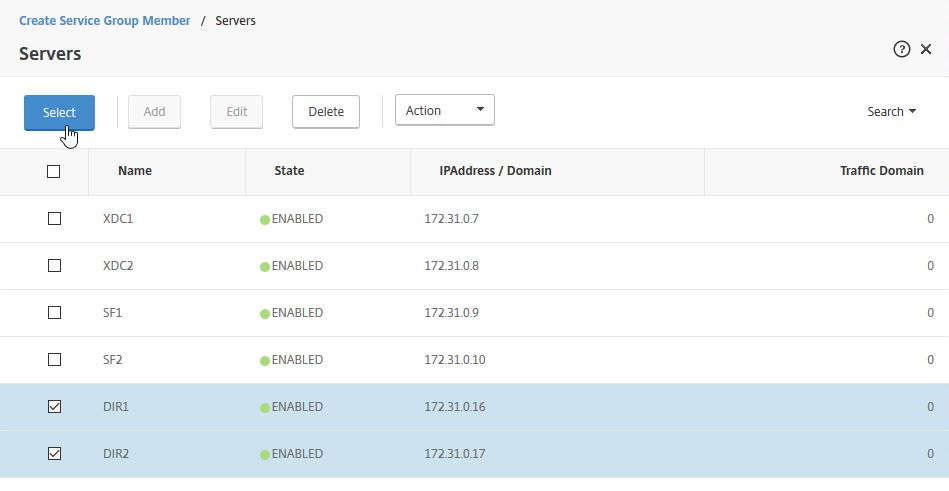
Select Server Based and click on > next to Select Server.

Select the StoreFront servers from the list and click Select.

Enter Port that the StoreFront servers listen on and click Create.

Click OK.

Click + Monitors in Advanced Settings and click No Service Group to Monitor Binding.

Click > for Select Monitor.

Select the StoreFront monitor from the list created earlier and click Select.

Click Bind.

Click + Settings in Advanced Settings.
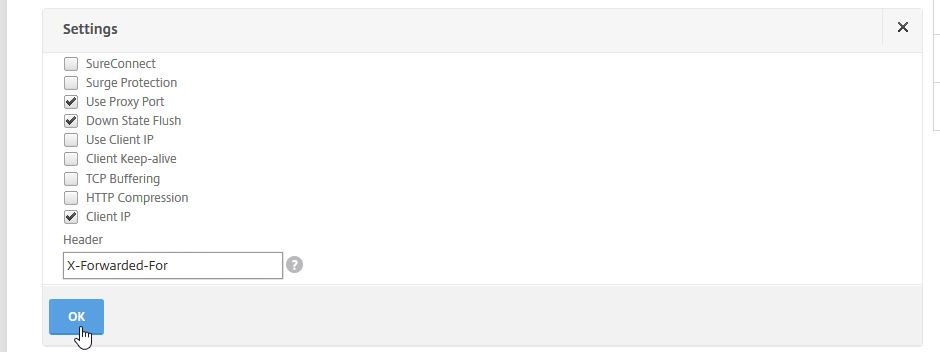
Select Client IP and in Header enter X-Forwarded-For. NetScaler inserts the client's IP address into this header, so StoreFront can see the IP address of the client that is connecting otherwise it only sees the Subnet IP (SNIP) address for every user. Click OK.

Click Done.

Click Add.

Enter Name and select SSL or HTTP for Protocol depending upon whether https or http will be used to access Director.

Click OK.

Click No Service Group Member.
Select Server Based and click on > next to Select Server.
Select the Director servers from the list and click Select.

Enter Port that the Director servers listen on and click Create.

Click OK.

Click + Monitors in Advanced Settings.

Click No Service Group to Monitor Binding.

Click > for Select Monitor.

Select the standard https or http monitor from the list (depending upon whether Director is configured to use https or not) and click Select.

Click Bind.

Click Done.

Once the service groups are created we create the virtual servers for them.

Expand Traffic Management > Load Balancing > Virtual Servers and click Add.

Enter Name, select http or SSL in Protocol and select Non Addressable in IP Address Type. As StoreFront will be accessed through the Content Switch the load balance virtual server does not need to be configured with an IP address and port. Click OK.

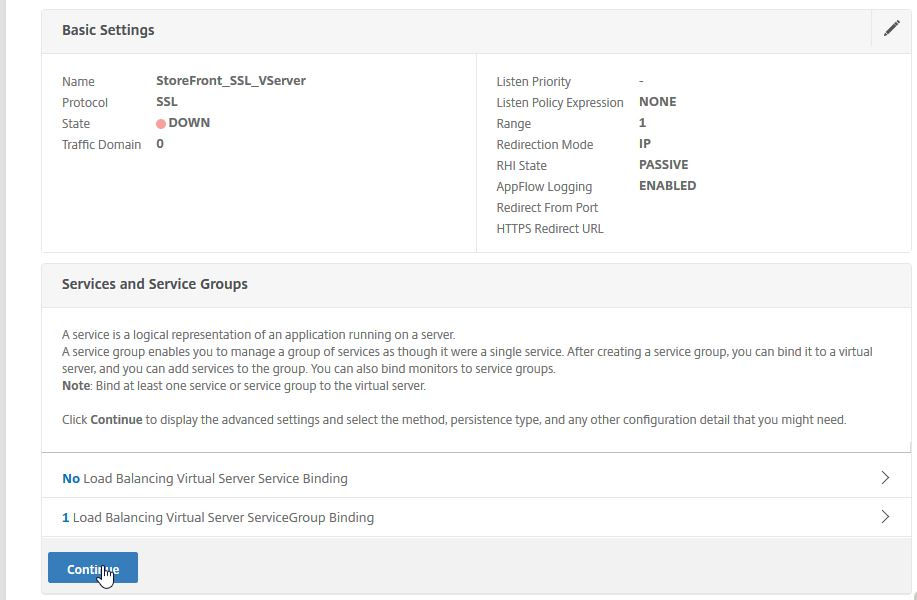
Click No Load Balancing Virtual Server Service Group Binding.

For Select Service Group Name click >.

Select the StoreFront service group from the list and click Select.

Click Bind.
Click Continue.

Click No Server Certificate. Only available when you choose SSL when creating the virtual server.

Click > next to Select Server Certificate.

Select the SSL certificate from the list and click Select.

Click Bind.

Click Continue.

Click + Persistence in Advanced Settings.

StoreFront requires sessions to persist on the server, so we are going to configure session cookies and fall back to source IP in the event the web browser does not support them. Select COOKIEINSERT in Persistence, set Time-out (mins) to 0, select SOURCEIP in Backup Persistence and set Backup Time-out. Click OK.

Click Done.

Click Add.

Enter Name, select http or SSL in Protocol and select Non Addressable in IP Address Type. As Director will be accessed through the Content Switch the load balance virtual server does not need to be configured with an IP address and port. Click OK.

Click No Load Balancing Virtual Server Service Group Binding.

Click > next to Select Service Group Name.

Select the Director service group created earlier and click Select.
Click Bind.
Click Add.
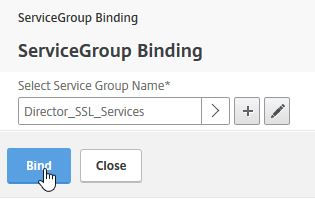
For Select Service Group Name click >.
Select the Director service group created earlier and click Select.
Click Bind.

Click Continue and click No Server Certificate.

Click > next to Select Server Certificate.
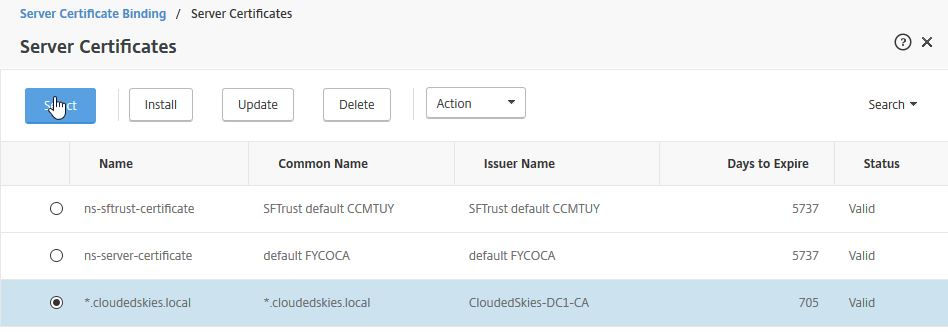
Select the SSL certificate from the list and click Select.

Click Bind.

Click Continue.

Click + Persistence in Advanced Settings.

Director requires sessions to persist on the server, so we are going to configure session cookies and fall back to source IP in the event the web browser does not support them. Select COOKIEINSERT in Persistence, set Time-out (mins) to 0, select SOURCEIP in Backup Persistence and set Backup Time-out. Click OK.

Click Done.

Both StoreFront and Director load balance virtual servers have been created.

Expand Traffic Management > Content Switching > Actions and click Add.

We are going to create a Content Switching action that directs traffic to a load balance virtual server. Enter Name and select LoadBalancing Virtual Server from the Choose Virtual Server or Expression drop-down box. Click > for Target Load Balancing Virtual Server.

Select StoreFront from the list of available virtual servers and click Select.

Click Create.

Click Add.

We are going to create a Content Switching action that directs traffic to a load balance virtual server. Enter Name and select LoadBalancing Virtual Server from the Choose Virtual Server or Expression drop-down box. Click > for Target Load Balancing Virtual Server.

Select the Director virtual server from the list and click Select.

Click Create.

Two content switching actions have been created one for StoreFront and the other for Director.

Expand Traffic Management > Content Switching > Policies and click Add.

Content switching policies define when the specified action is applied. Enter Name and select the action from the Action drop-down box in this case StoreFront. Expression contains the rule to identify when the action will be applied.
HTTP.REQ.HOSTNAME - accesses the requested host name found in the Host HTTP header.
HTTP_HEADER_SAFE - makes sure the host name contains only valid characters.
SET_TEXT_MODE(IGNORECASE) - ignores the case of the host name.
EQ("storefront.cloudedskies.local") - is the host name equal to storefront.cloudedskies.local.
Click Create.

Click Add.
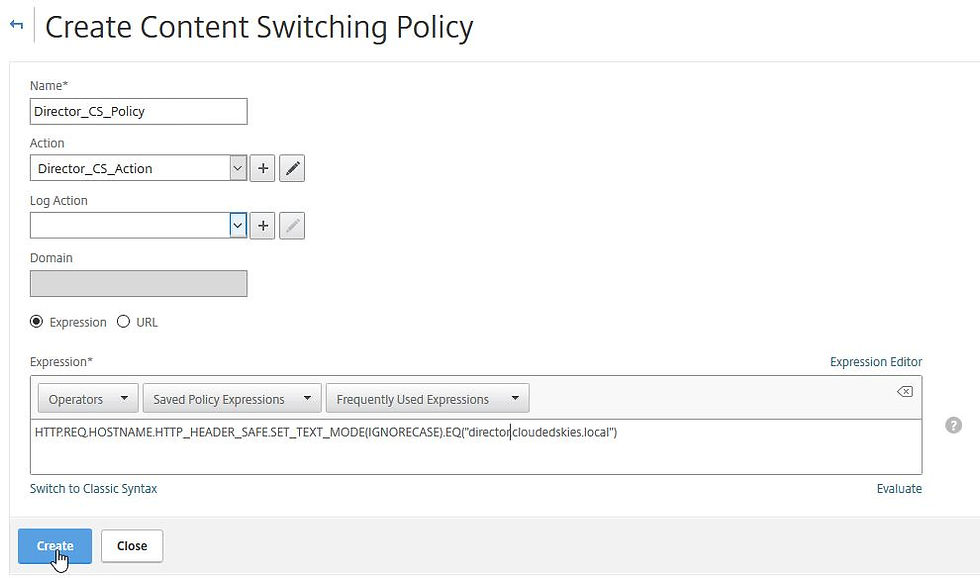
Enter Name and select the action from the Action drop-down box in this case Director. Expression contains the rule to identify when director.cloudedskies.local is requested.

StoreFront and Directory content switching policies have now been created.

Expand Traffic Management > Content Switching > Virtual Servers and click Add.

Enter Name, select SSL or HTTP in the Protocol drop-down box, enter IP Address and Port and click OK.

Click No Content Switching Policy Bound.

Click > next to Select Policy.

Select the StoreFront content switching policy from the list and click Select.

Click Bind.

Click 1 Content Switching Policy and Add Binding.

Click > next to Select Policy.

Select the Director content switching policy from the list and click Select.

Click Bind.

Click Close.

Optionally click No Default Virtual Server Bound.

From the drop-down box select the default virtual server, which all traffic will be sent to if none of the content switching policies bound to this virtual server apply. In this case it will go to the StoreFront load balance virtual server by selecting it from the Default Load Balancing Virtual Server Name drop-down box and click Bind.

Click OK.

For Content Switch virtual server configured with the SSL protocol click + Certificate in Advanced Settings.

Click No Server Certificate.

Click > next to Select Server Certificate.

Select the SSL certificate from the list and click Select.

Click Bind.

Click Continue.

Click Done.

The virtual server has now been created. Change DNS to point both StoreFront and Director FQDN to the content switch virtual server IP address.


Comments